Tutorial on Updating People
This tutorial is in two parts. In this first part an updater, Jill Rowling, logs in and makes changes to a persons data. In the second part another updater, Philip Maynard, logs in and checks Jill’s updates.
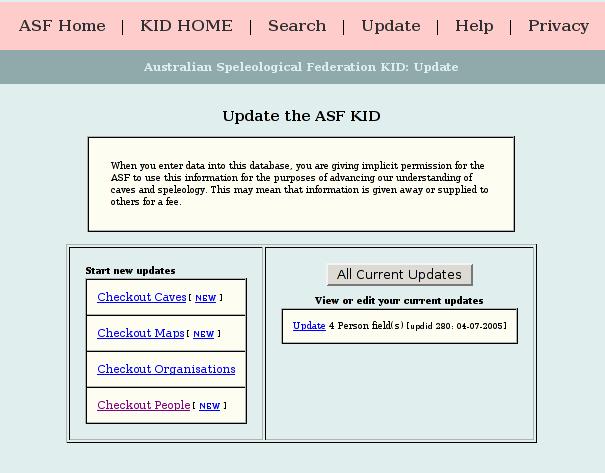
If you are logged in as an updater then there will be an “Update” link at the top of the page. Clicking this will bring you to the “Update Home Page”, the starting point for updating caves, maps, organisations and people.
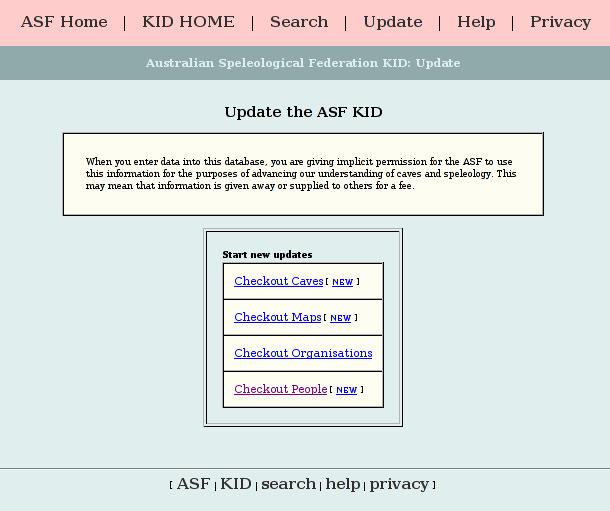
There are two links for people; “Checkout People” and “New”. “Checkout People” is used for updating the details for persons that already exist in the database. The link “New” is used to create new records for people that do not already exist in the database.
Click on “Checkout People” now and proceed to the next page.
Person Checkout Part 1: Begin Checkout Wizard
The work flow of an update begins with checking out a record. When you checkout a record of a cave(s), a person(s) or other entities that record is then locked so that only you have write access to it. Others can still read the data but other updaters, including State Coordinators, cannot edit it whist you “own” the record. Even if you just checkout a few fields you will own the entire record.
When you have finished making your editing changes you need to check-in the record. That is done automatically when TODO
The web-based KID requests information via a series of dialog screens, commonly known as a “Wizard”. The first screen of the data entry wizard asks for the source of the data so that any queries about the correctness of the data can be followed up to the source.
Who is keying in this data?
This will show your name and will display a list of the organisations that
you are a member of.
Who has supplied this data update?
This drop down list will list all persons who are in the database no matter what organisation
they are in. This is because an update may be supplied by anyone.
TODO FID [76] “Latest update by”
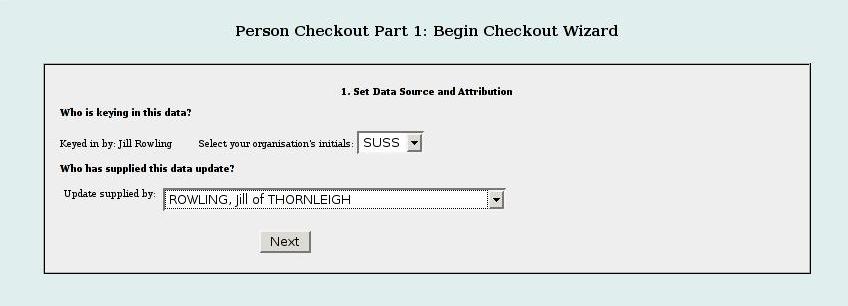
Hint: The drop down list of persons is very long, however there is a shortcut you can use to select a person. Let’s suppose I wish to select “Rowling, Jill of Thornleigh”. Place the mouse focus on the “Update supplied by” field, hold down the shift key and enter the first few letters of the persons name i.e. “row”. The drop down list box will jump to each matching person entry as you enter each letter.
Click on [ Next ] now and proceed to the next page.
Person Checkout Part 2: Search and Set Checkin

Setting the data source and attribution
Who has supplied this data update will be filled in from the previous screen however you need to enter the date on which the data was supplied to you.
TODO [424] Update - date
TODO [425] Update - person
TODO [428] Key-in - person ID
Next you need to enter the organisation that this update will be attributed to. Data is always attributed to an organisation – not to individuals. The organisation that you select here will receive the cudos of having made the data update.
The data source and attribution is now set and we can move onto selecting the person(s) to update.
Search for people to checkout
You must enter a persons surname and their state. You can enter more than one surname though. The search can be narrowed by entering a city, first name, or an organisation that they belong to. It doesn’t matter too much if your search here yields a few too many persons as you will be able to futher limit your selection later on.
Set the check-in date
Finally you have to set an estimated checkin date. This is very important. It is here to stop updaters from checking out records and never finishing their updates.
Note!: If you have not committed your updates before this date your updates will be dropped and the records that are checked out to you will be made available again.
Person Checkout Part 3: Select Fields
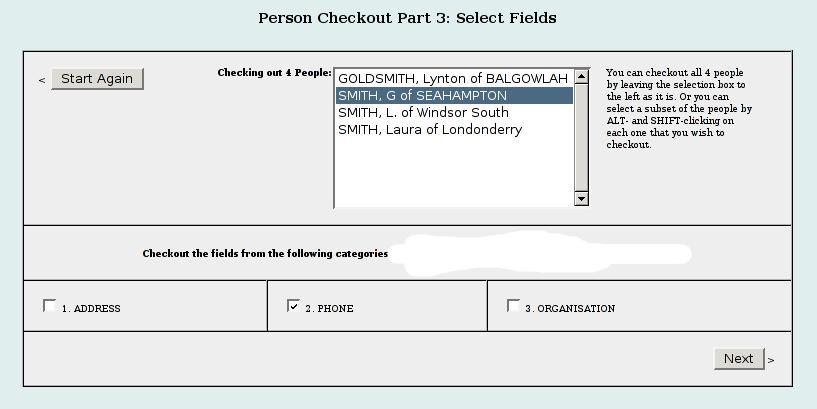
At this point you can select one or more of the persons selected in the previous screen. For instance in the example shown above you might wish to only edit one of the Smiths selected previously. Use Control-mouse click to select as many entries as required.
Select the fields that you wish to update then press [Next].
Person Checkout Part 4: Confirm Checkout
This screen allows you to review the person(s) that will be checked out and the fields selected for editing.
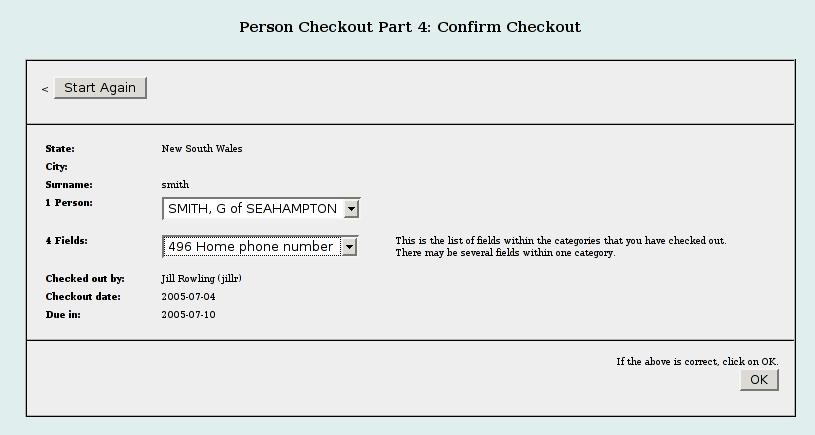
The top dropdown list shows the person(s) that will be checked out. The second drop down list shows the fields that you intend to edit. At this stage they are not yet actually checked out. They will be checked out when you click the [OK] button.
Some explanation of categories and fields is probably appropriate at this point.
Fields that you can update are collected into categories. For instance in the category
phone are four fields:
[496] Home phone number,
[497] Work phone number,
[498] Mobile phone number and
[499] Fax phone number.
The number in square brackets is the International Union of Speleology, Informatics
Commission (UISIC) field code. You can lookup the definition of any UISIC field (called a FID
for Field Identification) and view its properties by going to the documentation page
of the ASF KID at https://kid.caves.org.au/kid/doc.
The categories are purely an ASF categorisation.
Click OK to proceed. This will commit your checkout.
Person Edit Part 1: Data Entry
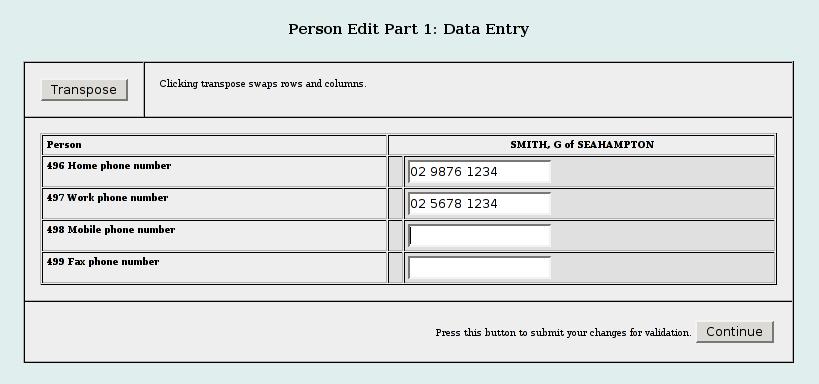
You can click the [Transpose] button to swap the rows and columns. This is useful if you have checked out many people but have only a few fields to edit. You may use the transpose button to flip between the two views of the data but only before you have done any editing.
Warning: Do not click transpose after you have made editing changes. The transpose button will return to page to its original state and any editing changes will be lost.
Click Continue to proceed. This will commit your changes.
Person Edit Part 2: Data Update Accepted
This screen shows that your update has been accepted and it will show the changes to the data that you have made. TODO show an example of an error?
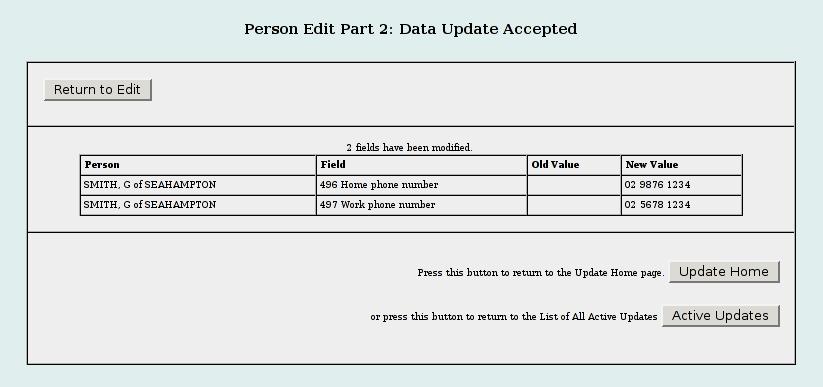
Clicking the [Update Home] button will return you to the Update Home page again.
Clicking the [Active Updates] button will take you to a screen showing you all of your current updates which are waiting to be checked. At this stage we should explain checking.
The ASF’s KID uses a peer review checking system. In this system updaters make changes to the data in the KID but all data changes must be checked by another updater before they are incorporated into the database.
If you clicked [Update Home Page] you will be at Update Home Page as in the following figure. You will see that your update is now listed. You can view or edit your current updates as many times as you wish.
If you clicked on the [Active Updates] button you will be at a page that lists all of your current updates i.e. the your updates that are still to be checked.
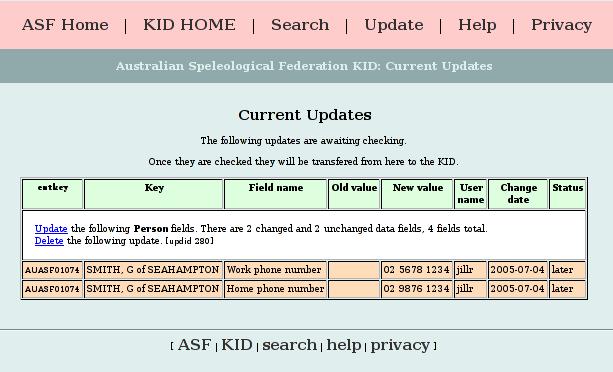
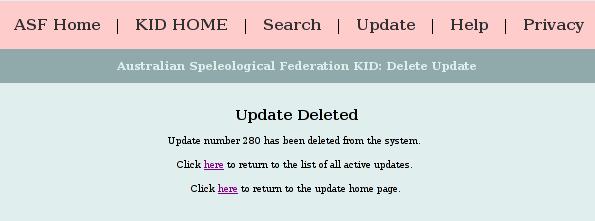
From this screen you can click [edit] to make changes to your previous update. The [delete] link can be used to totally delete an update. If you delete an update you will get a confirmation of that deletion.
If you now go to the Update Home Page or the page listing all of your current updates you will see that the deleted update is no longer listed. An other updater will notice that the update is no longer listed on their list to be checked.
Before your updates are accepted they need to be checked by another updater.